本文內容
- #元數據介紹 (@Component、Metadata)
- #組件樣式介紹 (樣式模組化範例)
- #樣式封裝 (Emulated , ShadowDom ,None)
- #特殊選擇器 (:host, ::ng-deep, :host-context)
#元數據介紹
透過指令建立一個組件,觀察 @Component(裝飾器) 中的內容 (Metadata)
組件的元數據告訴 Angular 從哪裡獲取創建和呈現組件及其視圖所需的資料,將組件及其範本組合起來形成畫面上我們看到的視圖。
ng g c styleExample
// 會建立出四個檔案分別是 :
// 1.style-example.component.html
// 2.style-example.component.scss
// 3.style-example.component.spec.ts
// 4.style-example.component.ts
// style-example.component.ts
import { Component } from '@angular/core';
@Component({
selector: 'app-style-example',
templateUrl: './style-example.component.html',
styleUrls: ['./style-example.component.scss']
})
export class StyleExampleComponent {
}透過 Angular指令建立出 Component 後,會發現 Angular 已經自己幫你輸入 HTML 範本的相對位置(./style-example.component.html)以及樣式表的相對位置(./style-example.component.scss)
@Component(裝飾器)中的內容可以理解為:當其他 HTML 範本上使用 <app-style-example> 這個選擇器,Angular 就會給他對應到selector的組件 (StyleExampleComponent),也就是結合以下三個檔案的內容:
templateUrl 上的範本 (style-example.component.html)
stylesUrls上的樣式表 (style-example.component.scss)
組件所需要的相關邏輯(style-example.component.ts)
接著我們來聊聊 stylesUrls,也就是負責導出樣式表的部分。 stylesUrls 的格式是 Array,那是否意味著可以導入多個 scss 檔案?答案是沒錯,一個視圖允許多個 scss 檔案來源。另外,樣式也不一定需要透過指定 scss 檔案的相對路徑來導入,除了預設的輸入 scss 檔案來源外,以下有幾種其他方式:
- 透過 styles 加在 metadata 中
import { Component } from '@angular/core';

@Component({
  selector: 'app-style-example',
  templateUrl: './style-example.component.html',
  styles: ['h1 {color:red}']
})
export class StyleExampleComponent {

}- 寫在 template 中
import { Component } from '@angular/core';

@Component({
  selector: 'app-style-example',
  template: '<style> h1 {color:red} </style> '<h1>h1</h1>',
  styleUrls: ['./style-example.component.scss']
})
export class StyleExampleComponent {

}- template link tags
import { Component } from '@angular/core';

@Component({
  selector: 'app-style-example',
  template: `
    <link rel="stylesheet" href="../assets/example.scss">
    <h1>h1</h1>
  `,
  styleUrls: ['./style-example.component.scss']
})
export class StyleExampleComponent {

}- 寫在 scss 檔案中使用 import
@import './header.css';#組件樣式介紹
稍微介紹完透過 Angular 指令產生 component 中裝飾器的原數據後讓我們回到主題:組件樣式元件的樣式表 ( 元數據下的styles )
在 @Component 中指定的樣式只會對該元件的範本生效,也就是 父元件 與 子元件的樣式表不會互相汙染
舉例來說,將父元件的 <H1> 字樣顏色設為紅色,將子元件的 <H1> 字樣設為藍色;在雙方為父子關係且都有對 <H1> 的樣式做調整,觀察輸出結果
// 父元件

import { Component } from '@angular/core';

@Component({
  selector: 'app-style-example',
  template: `
    <h1>Parent H1</h1>
    <app-style-example-child></app-style-example-child>
  `,
  styles: ['h1 {color: red;}']
})
export class StyleExampleComponent {

}
// 子元件
import { Component } from '@angular/core';
@Component({
selector: 'app-style-example-child',
template: '<h1>Child H1</h1>',
styles: ['h1 {color: blue;}']
})
export class StyleExampleChildComponent {
}
會發現父子元件的樣式表並不會互相影響,也不會影響專案內其他使用到的 <H1> 的樣式。
專案中可能在多個組件中都會對同一個元素或是 class 的樣式做調整,但是我們不會希望在 A 組件調整了一個樣式結果不小心連 B 組件也一起動到,這會造成維護不易,樣式模組化的好處之一就是樣式表隔離。
那 Angular 是如何做到樣式表隔離的呢?首先打開網頁檢查觀察元素的內容

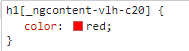
看下 <h1> 元素上被加上了 "_ngcontent-uyu-c21",但於我們的程式中並沒有加上這個屬性,為什麼會多出這個屬性?這是因為 Angular 會替每個元件加上獨有的屬性,讓選擇器只會選到當前元件的元素,用以防止互相汙染。
#樣式封裝
上面組件樣式介紹中提到樣式模組化的特性,對於不同樣式表對同一個元素進行修改,為何能在不同 Component 中不互相影響?那若想讓子層繼承父親的樣式又應該如何設定?這邊就是接下來要講的樣式封裝
Angular 總共提供了三種樣式封裝的選項在裝飾器中可選,分別為:Emulated、ShawdowDom、None
- Emulated (預設) [ Emulated 可以理解為:只進 & 不出]
只進 ( 在全局樣式styles.scss中修改 h1的樣式,會影響到 Component )
// styles.scss
h1 {
    color: green
}
// component
import { Component, ViewEncapsulation } from '@angular/core';
@Component({
selector: 'app-style-example',
template: '<h1>H1</h1>',
styles: [],
encapsulation: ViewEncapsulation.Emulated
})
export class StyleExampleComponent {
}
不出 ( parent 將 <h1> 樣式設為了紅色,不影響其他組件的 <h1> 樣式顏色 )
// parent
import { Component, ViewEncapsulation } from '@angular/core';

@Component({
  selector: 'app-style-example',
  template: '<h1>Parent H1</h1> <app-style-example-child></app-style-example-child>',
  styles: ['h1 {color: red;}'],
  encapsulation: ViewEncapsulation.Emulated
})
export class StyleExampleComponent {

}

// child
import { Component, ViewEncapsulation } from '@angular/core';

@Component({
  selector: 'app-style-example-child',
  template: '<h1>Child H1</h1>',
  styles: [],
  encapsulation: ViewEncapsulation.Emulated
})
export class StyleExampleChildComponent {

}
小結:Emulated 會吃到全局樣式,並且不將樣式傳給子層、兄弟層。
2. ShadowDom [ ShadowDom 可以理解為:不進 & 不出]
不進 ( 在全局樣式styles.scss中修改 h1的樣式,不會影響到 Component )
// styles.scss
h1 {
    color: green
}
import { Component, ViewEncapsulation } from '@angular/core';
@Component({
selector: 'app-style-example',
template: '<h1>H1</h1>',
styles: [],
encapsulation: ViewEncapsulation.ShadowDom
})
export class StyleExampleComponent {
}
不出 ( 將 <h1> 樣式設為了紅色,不影響其他同層級組件的 <h1> 樣式顏色 )
// showdowDom
import { Component, ViewEncapsulation } from '@angular/core';

@Component({
  selector: 'app-style-example',
  template: '<h1>H1</h1>',
  styles: ['h1 {color: red;}'],
  encapsulation: ViewEncapsulation.ShadowDom
})
export class StyleExampleComponent {

}
// 同層級元素 (無設置 h1 樣式)
import { Component } from '@angular/core';
@Component({
selector: 'app-style-example-brother',
template: '<h1>Brother H1</h1>',
styles: []
})
export class StyleExampleBrotherComponent {
}// app.component.html
<app-style-example></app-style-example>
<app-style-example-brother></app-style-example-brother>
但是,ShadowDom雖然不影響同層級的組件,卻會影響該組件下所有子層級樣式。舉例來說,目前的組件有四個,分別是:祖父、父親、子孫、曾子孫。在父親層使用 ShadowDom,則往下所有組件都會繼承父親層的樣式表
// 父親層

import { Component, ViewEncapsulation } from '@angular/core';

@Component({
  selector: 'app-style-example',
  template: '<h1>Parent H1</h1> <app-style-example-child></app-style-example-child>',
  styles: ['h1 {color: red;}'],
  encapsulation: ViewEncapsulation.ShadowDom
})
export class StyleExampleComponent {

}
// 祖父
@Component({
selector: 'app-style-example-grandparent',
template: '<h1>GrandParent H1</h1> <app-style-example></app-style-example>',
styleUrls: ['./style-example-grandparent.component.scss']
})
// 子孫
@Component({
selector: 'app-style-example-child',
template: '<h1>Child H1</h1> <app-style-example-grandson></app-style-example-grandson>',
styles: []
})
// 曾子孫
@Component({
selector: 'app-style-example-grandson',
template: '<h1>Grandson H1</h1> ',
styleUrls: ['./style-example-grandson.component.scss']
})
小結:Shawdow Dom 不會吃到全局樣式,並且不將樣式傳給兄弟層,但所有子層皆會繼承樣式。
不過!若是子層的樣式表同樣有對父層的調整過的元素重複設定,那麼子層的樣式仍然會以子層的設定為主。
// 父層
import { Component, ViewEncapsulation } from '@angular/core';

@Component({
  selector: 'app-style-example',
  template: '<h1>Parent H1</h1> <app-style-example-child></app-style-example-child>',
  styles: ['h1 {color: red;}'],
  encapsulation: ViewEncapsulation.ShadowDom
})
export class StyleExampleComponent {

}

// 子層
import { Component } from '@angular/core';

@Component({
  selector: 'app-style-example-child',
  template: '<h1>Child H1</h1>',
  styles: ['h1 {color: blue;}']
})
export class StyleExampleChildComponent {

}
3. None [ None 可以理解為:能進 & 能出]
能進 ( 在全局樣式styles.scss中修改 h1的樣式,會影響到 Component )
h1 {
    color: green
}
import { Component, ViewEncapsulation } from '@angular/core';
@Component({
selector: 'app-style-example',
template: '<h1>H1</h1>',
styles: [],
encapsulation: ViewEncapsulation.None
})
export class StyleExampleComponent {
}
會出 ( 不論兄弟層或子層,皆會受到本樣式表影響 )
// 父親

import { Component, ViewEncapsulation } from '@angular/core';

@Component({
  selector: 'app-style-example',
  template: '<h1>Parent H1</h1> <app-style-example-child></app-style-example-child>',
  styles: ['h1 {color: red;}'],
  encapsulation: ViewEncapsulation.None
})
export class StyleExampleComponent {

}
// app.component.html
<app-style-example></app-style-example>
<app-style-example-brother></app-style-example-brother>
#特殊選擇器
:host
(表示選擇當前的組件)
// 沒有使用 :host

import { Component, ViewEncapsulation } from '@angular/core';

@Component({
  selector: 'app-style-example',
  template: `
  <h1>Parent H1</h1>
  `,
  styles: [`
    h1{ color:red;  }
  `]
})
export class StyleExampleComponent {

}
// 使用 :host
import { Component, ViewEncapsulation } from '@angular/core';

@Component({
  selector: 'app-style-example',
  template: `
  <h1>Parent H1</h1>
  `,
  styles: [`
    :host h1{ color:red;  }
  `]
})
export class StyleExampleComponent {

}
可以發現加上 :host 後,屬性上從原先的
h1[_ngcontent-qid-c20]
被修改為
[_nghost-qid-c20] h1[_ngcontent-qid-c20]
這表示只選取當前組件的 DOM,那這樣有什麼用意?我們接著看ng-deep
::ng-deep
(忽略的層級關係,直接找到並修改所有符合的 className)
現在有兩個組件分別是父組件以及子組件,分別有一個 <h1>;觀察子組件修改 h1 會發生什麼事
// 父組件
import { Component, ViewEncapsulation } from '@angular/core';

@Component({
  selector: 'app-style-example',
  template: `
  <h1>Parent H1</h1>
  <app-style-example-child></app-style-example-child>
`,
  styles: [`
    `]
})
export class StyleExampleComponent {

}

// 子組件
import { Component } from '@angular/core';

@Component({
  selector: 'app-style-example-child',
  template: '<h1>Child H1</h1>',
  styles: [`
     ::ng-deep h1{
      color:blue;
    }
  `]
})
export class StyleExampleChildComponent {

}
接著加上 ng-deep 再修改一次 <h1> 後觀察結果
// Child

import { Component } from '@angular/core';

@Component({
  selector: 'app-style-example-child',
  template: '<h1>Child H1</h1>',
  styles: [`
     ::ng-deep h1{
      color:blue;
    }
  `]
})
export class StyleExampleChildComponent {

}
我們再加上一個 Brother 組件,是與 Child同層 以及一個 Grandson 組件是包在 Child 組件底下,看 Child 組件的 ng-deep 會不會影響到 Brother 組件 與 Grandson 組件
// Child 組件

import { Component } from '@angular/core';

@Component({
  selector: 'app-style-example-child',
  template: '<h1>Child H1</h1> <app-style-example-grandson></app-style-example-grandson>',
  styles: [`
     ::ng-deep h1{
      color:blue;
    }
  `]
})
export class StyleExampleChildComponent {

}<app-style-example></app-style-example> // 包含parent , child , grandson
<app-style-example-brother></app-style-example-brother> // brother
那若是只想要修改使用 ng-deep 的組件(Child) 以及其子組件 (Grandson) ,應該如何設定?這時候就要透過先前的 :host 選擇器,就可以達到這個效果
import { Component } from '@angular/core';

@Component({
  selector: 'app-style-example-child',
  template: '<h1>Child H1</h1> <app-style-example-grandson></app-style-example-grandson>',
  styles: [`
     :host ::ng-deep h1{
      color:blue;
    }
  `]
})
export class StyleExampleChildComponent {

}
小結:僅使用 ::ng-deep 會使該對應到該 className 的所有元素喪失屬性選擇器,使得所有包含該 className 的元素受到影響 (使該樣式失去樣式封裝,會影響所有兄弟組件),通常會在 ng-deep 前加上 :host,將 ng-deep 的設定留在組件樹內部。另外現 ng-deep 已棄用。
::host-content
( 與上層DOM匹配時才會觸發 )
舉例來說,目前有一個父層與一個子層。子層有一個 <h1>,且子層僅當父層於子層外有 <div> 時才觸發,則可以寫:
// 子層
import { Component } from '@angular/core';

@Component({
  selector: 'app-style-example-child',
  template: '<h1>Child H1</h1>',
  styles: [`
     :host-context(div) h1 { color: red }
  `]
})
export class StyleExampleChildComponent {

}

// 父層
import { Component, ViewEncapsulation } from '@angular/core';

@Component({
  selector: 'app-style-example',
  template: `
  <div>
    <app-style-example-child></app-style-example-child>
  </div>
`,
  styles: [``]
})
export class StyleExampleComponent {

}
若父層外沒有符合子層要的 div 時,如
// 父層

import { Component, ViewEncapsulation } from '@angular/core';

@Component({
  selector: 'app-style-example',
  template: `
    <app-style-example-child></app-style-example-child>
`,
  styles: [`
    `]
})
export class StyleExampleComponent {

}